
MetaMask is the most popular Ethereum-based wallet, used primarily for DeFi, connecting to dApps, and
accessing other EMV compatible blockchains. Alongside Ethereum, MetaMask is also compatible with chains such as Polygon, Avalanche, Fantom, Optimism, and of course… Arbitrum.
Arbitrum is great for low-cost and fast transactions, making it one of the most popular layer-2s available.
If you’re looking to try out what Arbitrum has to offer, this guide will help you get started.
TLDR; The four steps to connect to Arbitrum Network
- Open your MetaMask wallet
- Click on Settings > Networks > Add a network
- Paste in the Arbitrum Network details
- Send funds to Arbitrum Network (Optional)
Before we begin, it’s important that you have MetaMask installed. If you haven’t got MetaMask installed, you can read our guide on how to set it up.
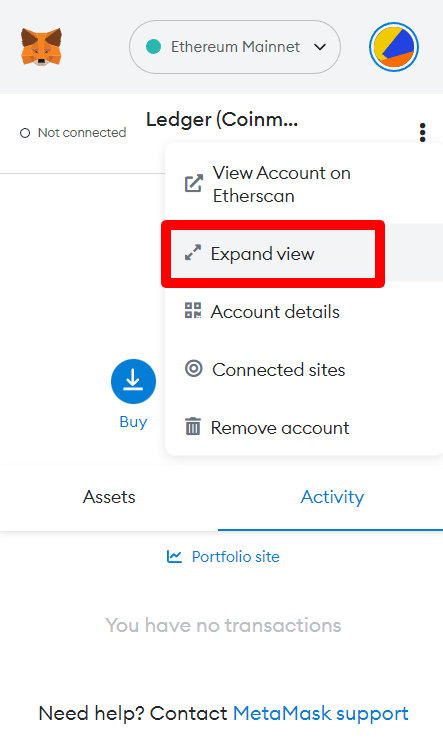
Step 1: Open MetaMask
Login to your MetaMask wallet on either your browser or mobile.
Open up MetaMask in a full-view window (if you’re on desktop) by clicking on the Account options icon and then on Expand view. This will make it easier for you to follow along. MetaMask should now be open in a new tab.
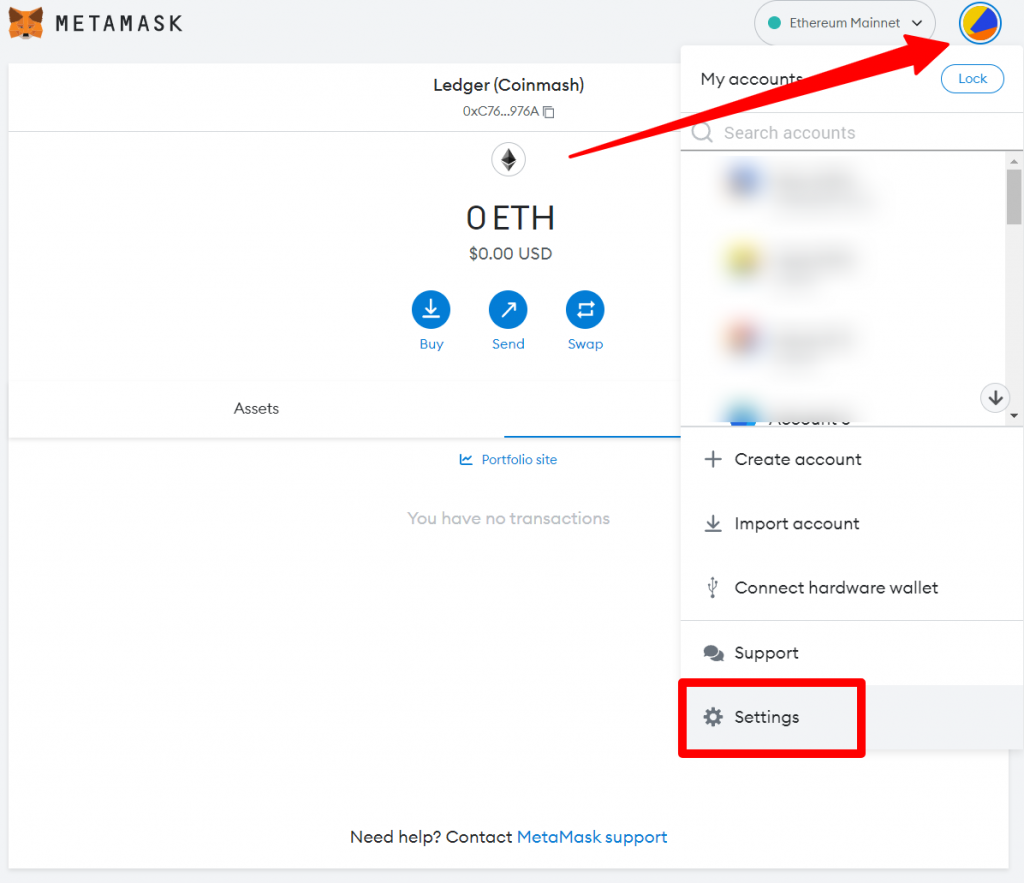
Step 2: Open Settings > Networks > Add a network
Next, click on your account icon in the top right of the page and click on Settings. This will open up a new page. Next, click on the Networks tab in the menu on the left.
Now click on Add a network to add it manually.
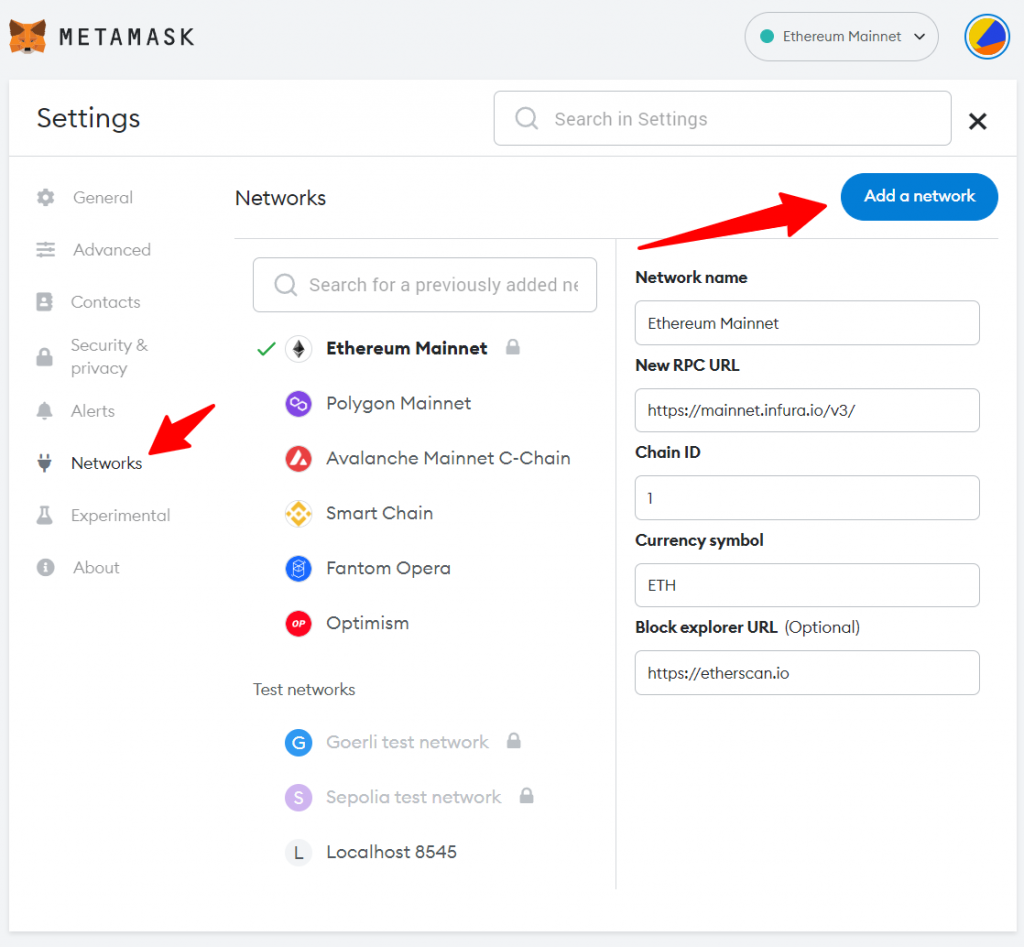
Step 3: Add Arbitrum Network
From there, you can either select Arbitrum from the ‘Popular custom networks’ column, or if it’s not there, you can click on Add a network manually and then paste in the details below under each heading (making sure to double check.)
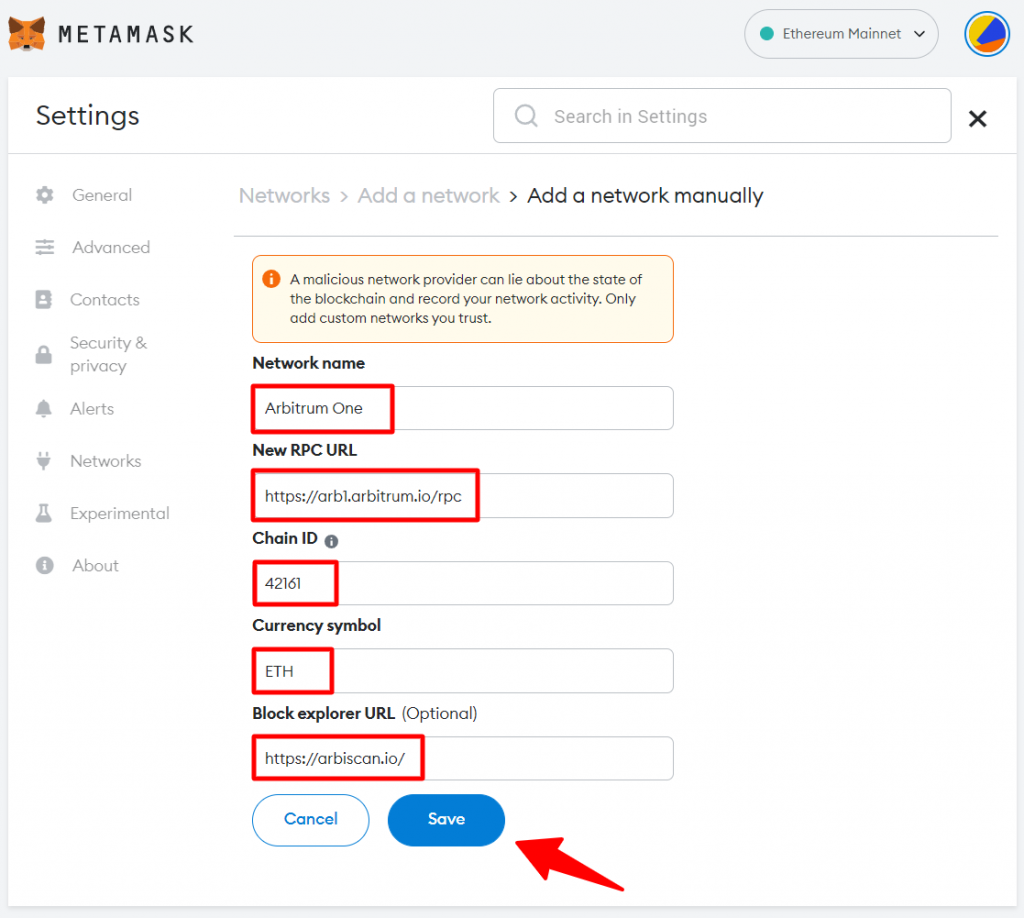
Network Name: Arbitrum One
RPC URL: https://arb1.arbitrum.io/rpc
ChainID: 42161
Symbol: ETH
Block Explorer URL: https://arbiscan.io/
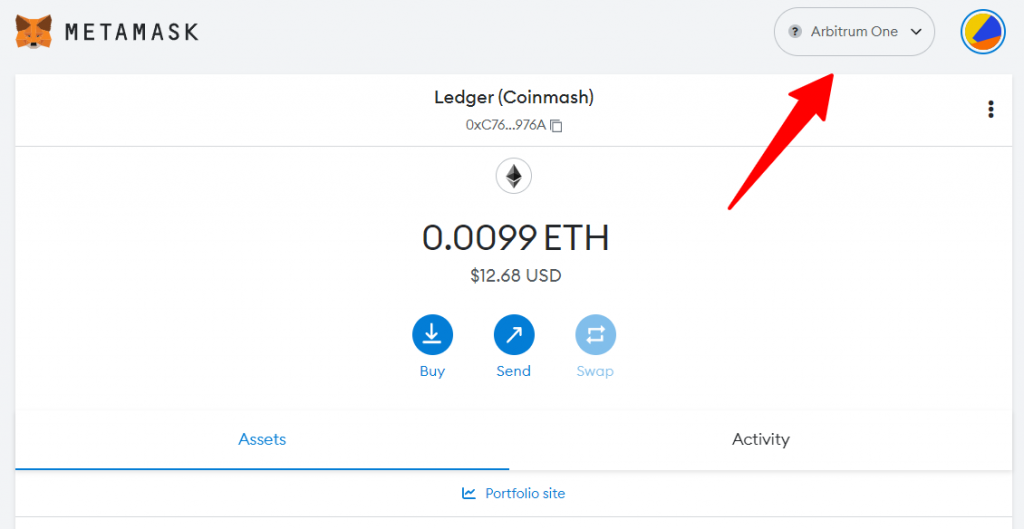
Once you’ve added all the fields, click Save to add Arbitrum to MetaMask.
You should now see Arbitrum as your selected network.
Step 4: Send ETH to Arbitrum (Optional)
Now that you have Arbitrum added, you’ll probably want to start using the network.
There are two options for adding funds: Bridging assets from another Network or depositing directly from a centralized exchange.
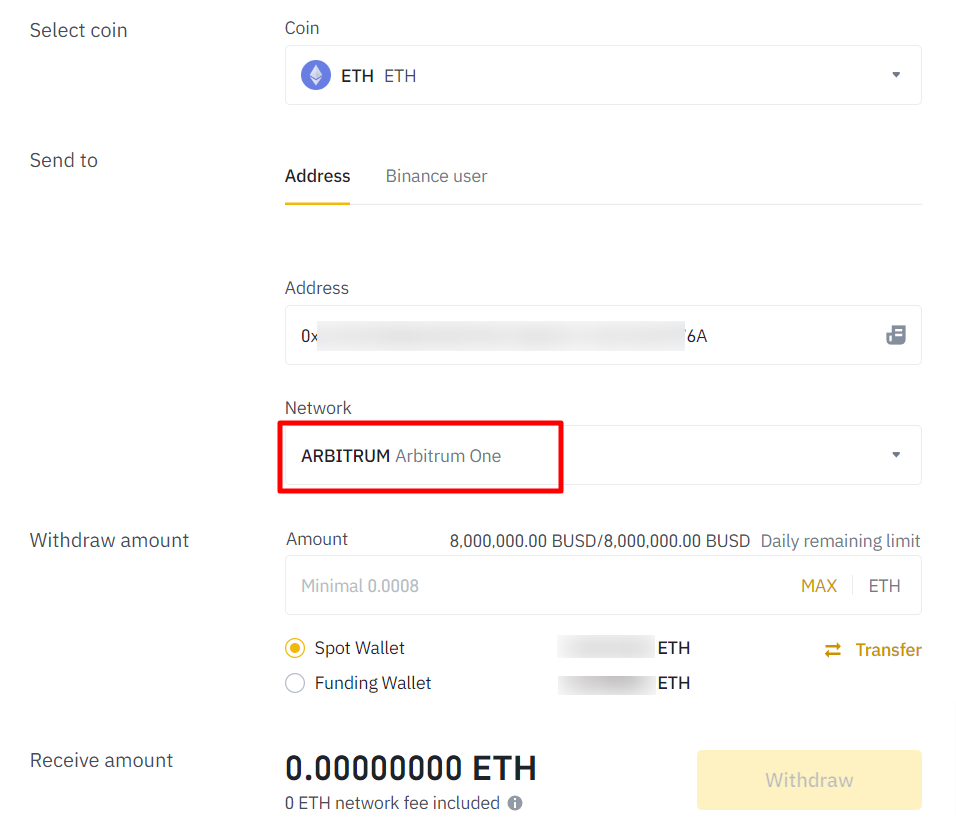
Since Arbitrum is yet to launch a native token, you’ll need to send a compatible token such as ETH. You can easily buy ETH on any major exchange, for this we recommend using Binance.
Just make sure when withdrawing you choose the Arbitrum Network, as shown below.
If you’d like to go with the other method of bridging your assets, then you can read our full guide on how to bridge to Arbitrum. Or alternatively, you view the full list of Arbitrum bridges here.
Other Arbitrum Wallets
Some other popular wallets that are compatible with Arbitrum are:
- Rainbow
- Coinbase Wallet
- Trust Wallet
- DeBank
- Zapper


