OpenSea is the largest NFT (non fungible token) marketplace and is home to some of the most popular NFT collections, such as Bored Ape Yacht Club, Doodles, Moonbirds, and many more.
Getting started with NFTs can be confusing, and knowing where to begin is hard. In this article, we will go through everything you need to do in order to purchase your first NFT on OpenSea.
How to Buy NFT on OpenSea
When it comes to purchasing and storing your first NFT, the first thing you need is a Ethereum wallet. There are tons of options for wallets, each with slightly different features and use-cases.
To keep this tutorial simple, we are going to be using MetaMask.
MetaMask is the most popular NFT wallet and is available on both desktop and mobile, making it the perfect candidate for purchasing your first NFT.
If you are looking to try out other NFT mobile wallets, we recommend Coinbase Wallet and Trust Wallet.
Step 1: Install MetaMask
MetaMask is available on IOS, Android, and supported on desktop browsers Chrome, Brave, Firefox, and Edge. For this tutorial, we are going to be using the Chrome extension, but if you wish to follow along on the Mobile app the process is quite similar.
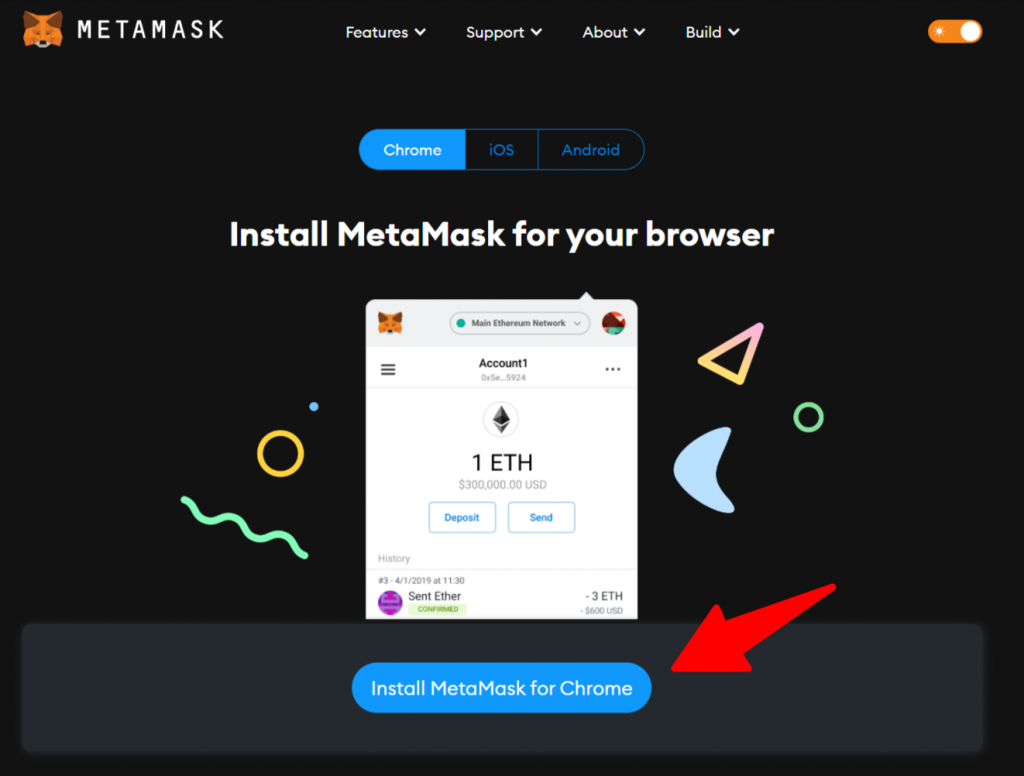
Visit the official MetaMask downloads page (Ensure the address is correct: metamask.io/download) then click “Install MetaMask for Chrome” and add the extension to Chrome.
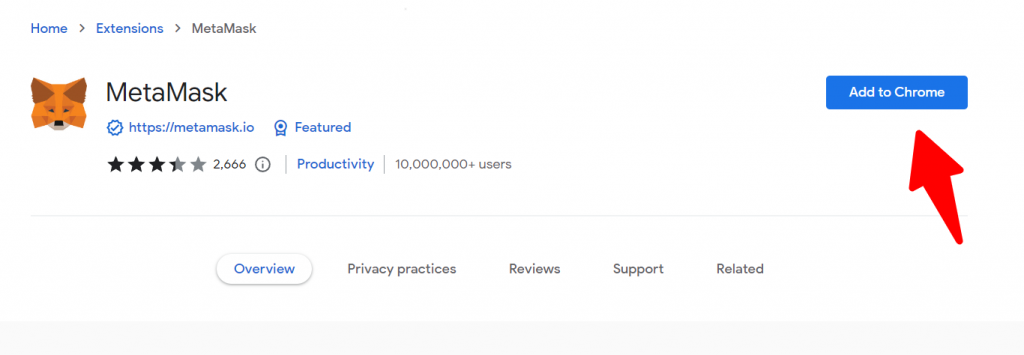
After MetaMask has completed downloading, click on the MetaMask extension in your browser and click “Get Started”.
Step 2: Create your MetaMask Wallet
Wallets are where you are going to store your NFTs and any cryptocurrencies such as Ethereum. Wallets have a public key and a private key. As the name suggests, your private key should remain private because anyone who has access to it can access your wallet.
MetaMask uses a “Secret Recovery Phrase” that acts as a private key, it is highly important that you do not lose this, because if you do, you will no longer have access to your wallet.
Lets get started with creating your wallet.
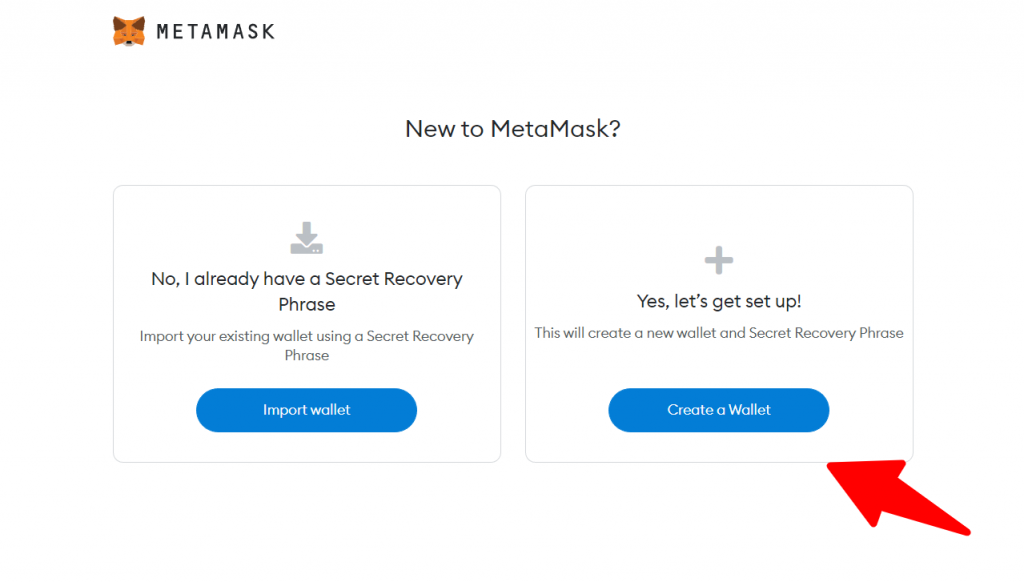
Click “Create a Wallet” and agree to the terms.
Create a new password to access your MetaMask wallet (this is not your private key) and click “Create”.

Reveal your “Secret Recovery Phrase” and write it down. This will be your private key to access all your MetaMask wallets. DO NOT LOSE THIS. After storing the phrase safely, click “Next”.
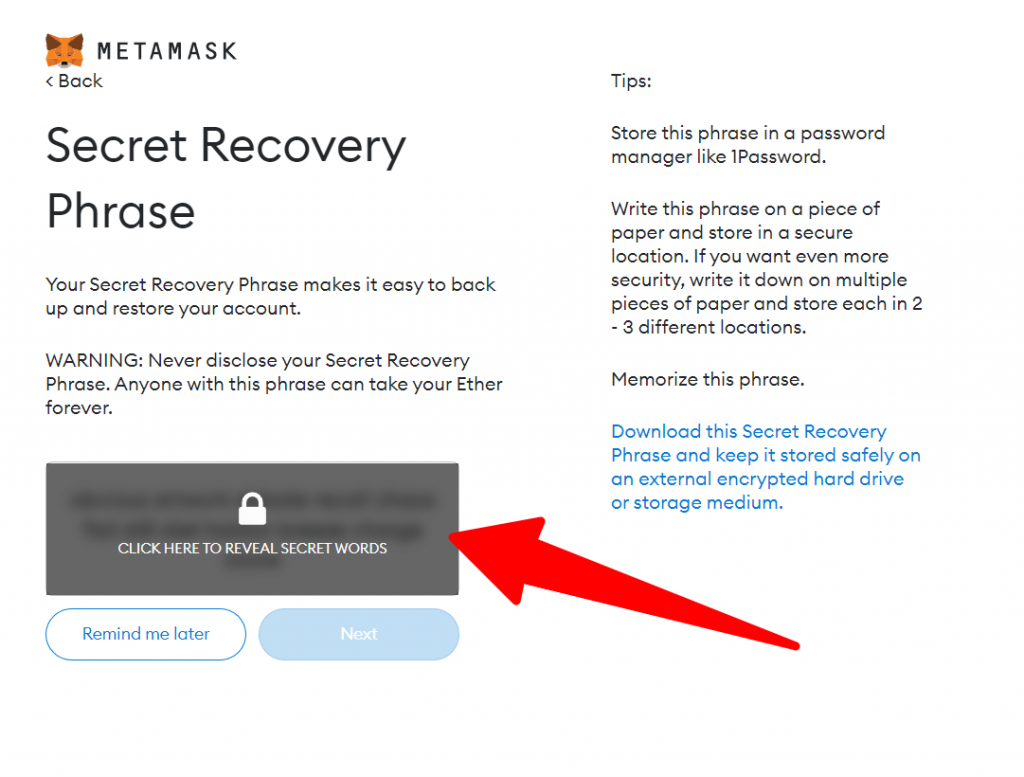
Confirm your “Secret Recovery Phrase” by clicking the words in order. Then press “Confirm”.

Congrats! You have just created your first Ethereum wallet with MetaMask. You can view your Ethereum address by hovering over the account name and copying it to your clipboard.
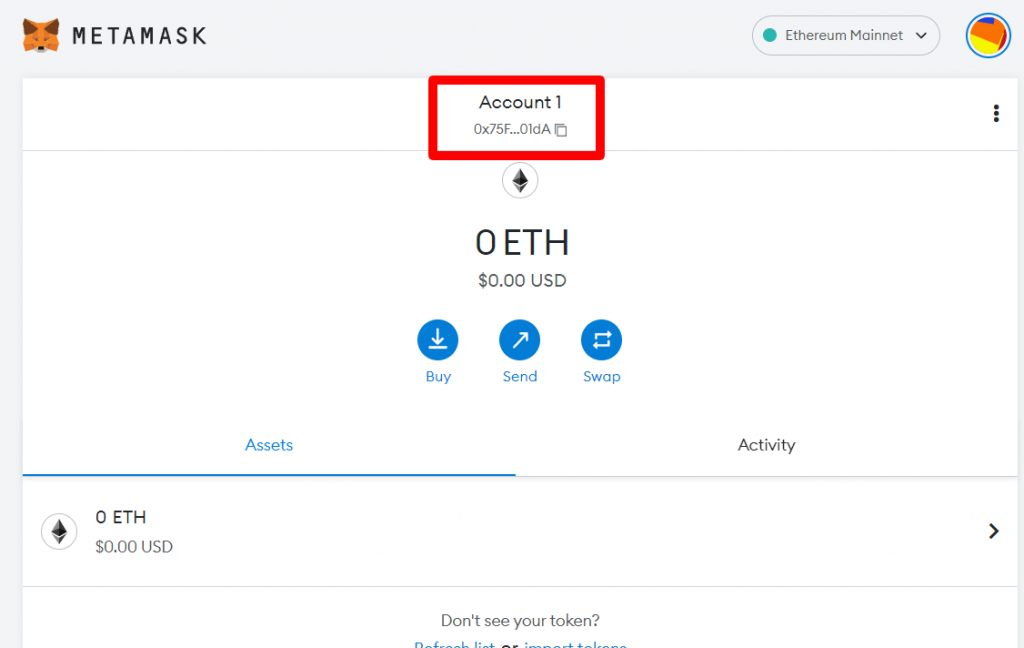
Now all that is left to do is to fund the wallet with some Ethereum and purchase your first NFT on OpenSea.
Step 3: Add Funds to Your MetaMask Wallet
Let’s buy some Ethereum! Ethereum (ETH) is the “currency” used to purchase NFTs on OpenSea. Similar to Bitcoin, but with different functionality, Ethereum is the second largest cryptocurrency to date and is used by thousands of people daily.
There are a few different ways of funding your MetaMask wallet. For this article, we are going to be purchasing Ethereum directly through the MetaMask extension.
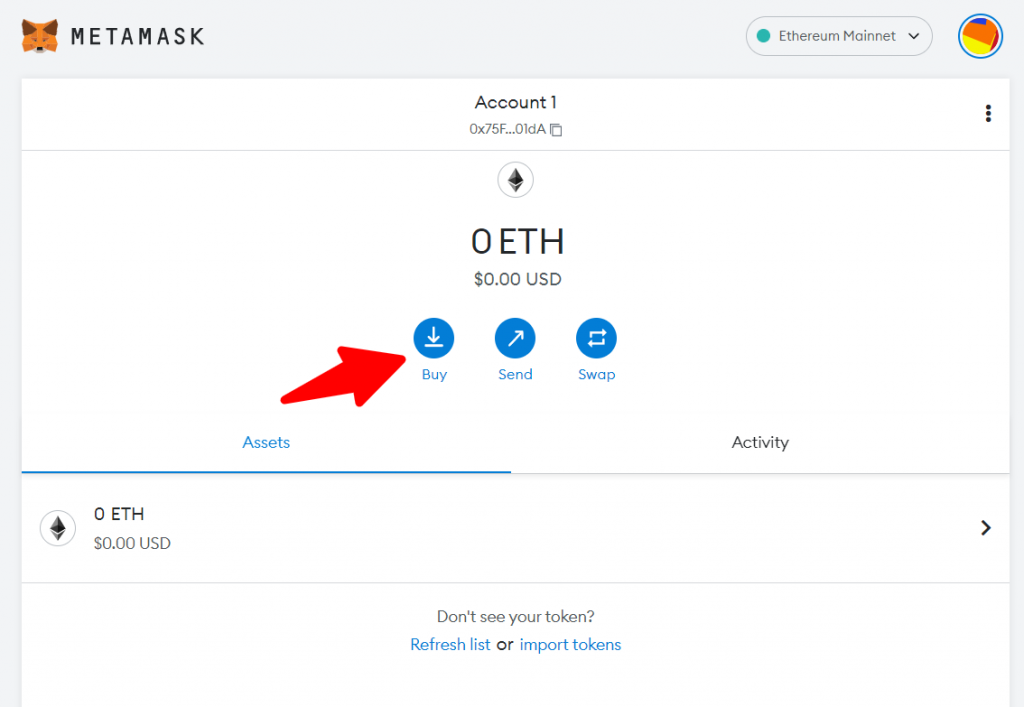
Go to your MetaMask wallet and click “Buy”.
Choose your deposit method (we went with Wyre) from the list provided. If you have already purchased some Ethereum on an exchange like Binance or Coinbase, then click “View Account” and deposit your Ethereum using the QR code or Ethereum address.
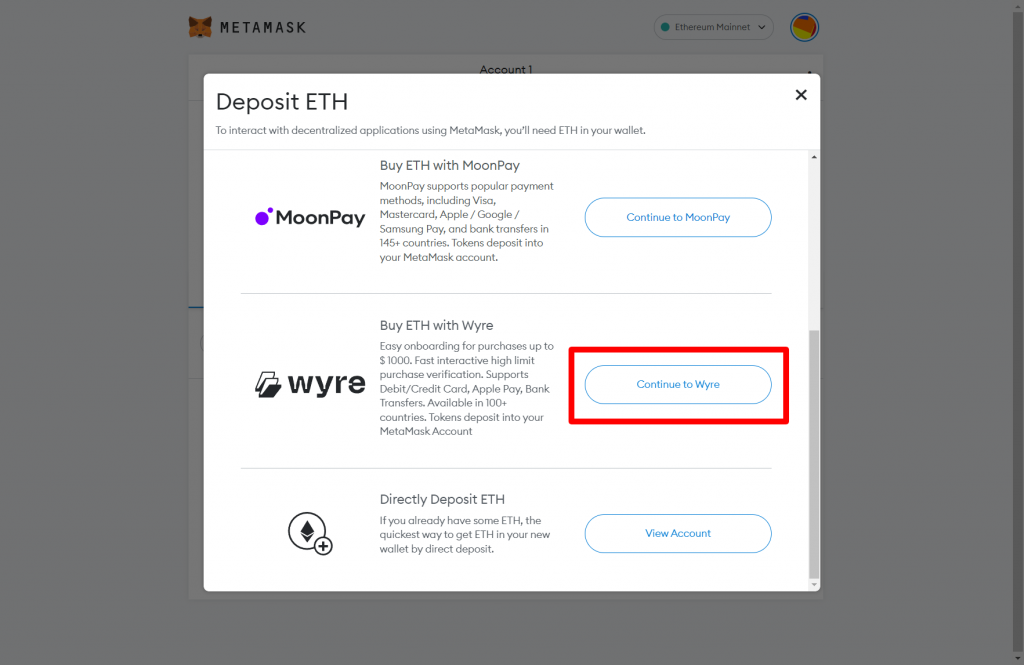
Choose your deposit amount and payment method and then click “Next”.
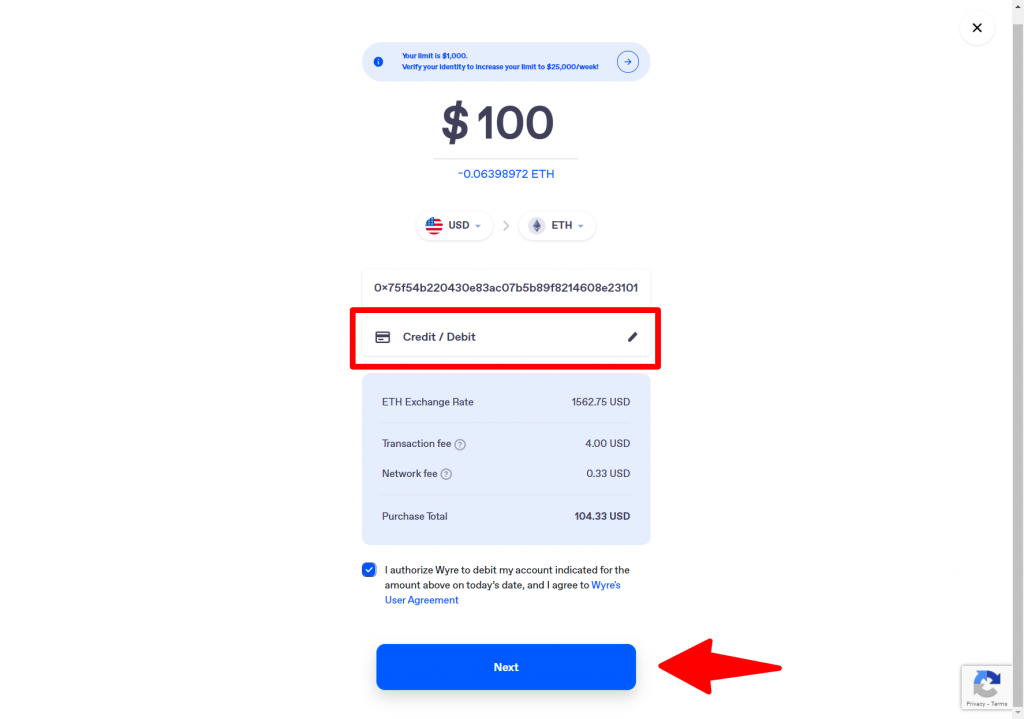
Fill in your payment information and click “Submit”.
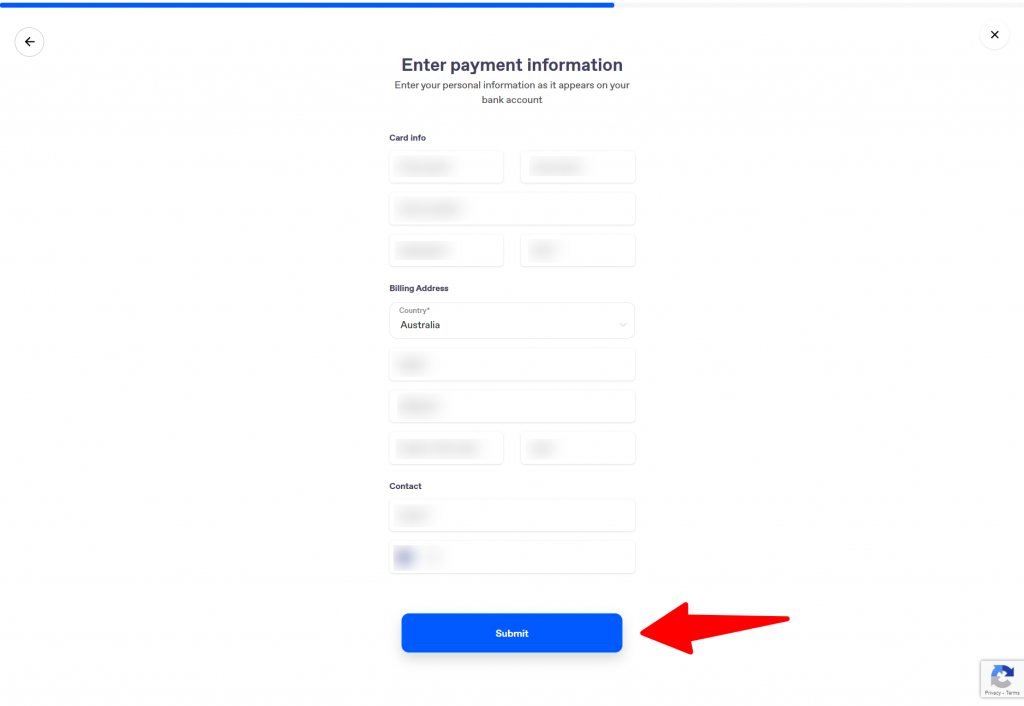
Authorize your payment with the 6-digit number that is sent to your mobile.
And that’s it! Your MetaMask wallet should be funded with Ethereum within a few minutes. You can track the transaction on Etherscan by looking up the transaction address.
Now that you have set up your MetaMask and deposited some Ethereum, it’s time to visit the OpenSea Marketplace and find an NFT to buy.
Step 4: Connect your Wallet to OpenSea
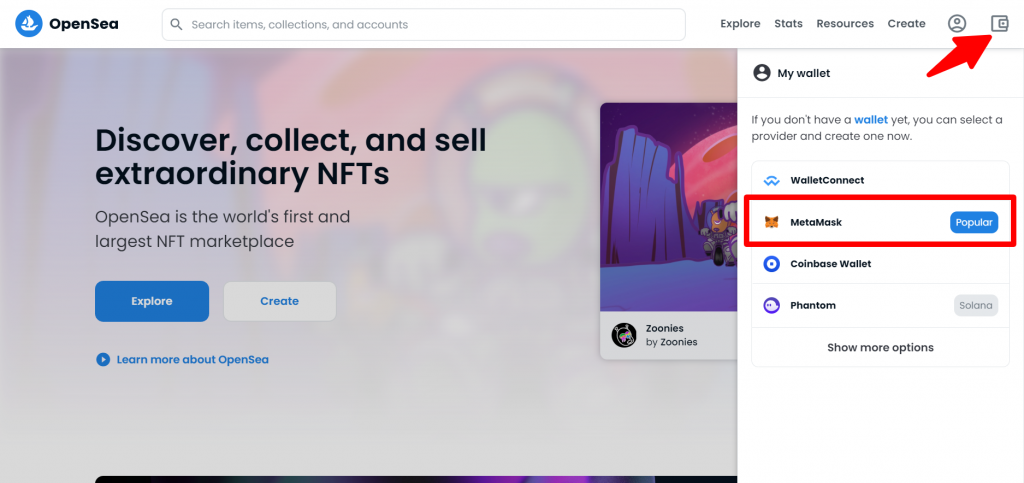
Visit the official OpenSea website (ensure that the URL is opensea.io) and click the Wallet icon in the top right of the website and select “MetaMask” (if you’re following along with a Coinbase Wallet, then select “Coinbase Wallet” instead).
Follow the prompts in the window popup to connect your MetaMask wallet and click “Accept and sign” and sign the transaction in your MetaMask wallet.
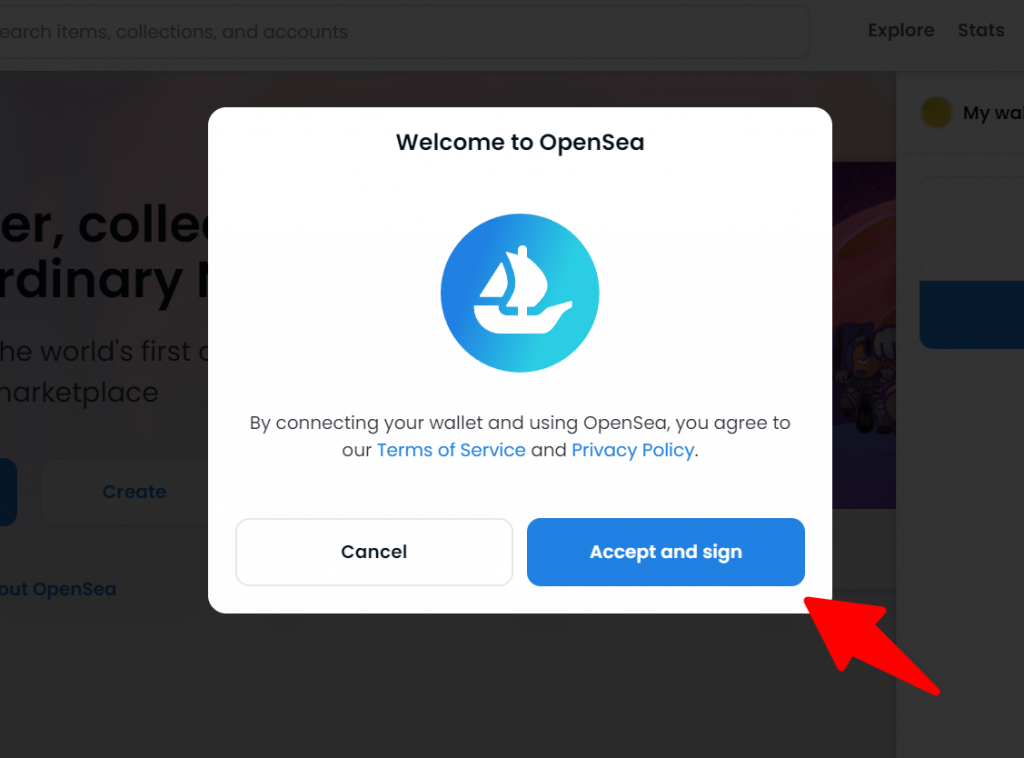
Your wallet should now be connected to OpenSea! You can now visit your profile and see your collection of purchased NFTs (which will be empty… for now).
Go ahead and customize your profile, add a username and bio, and connect your socials (if you wish to do so).
You should also be able to see your balance when clicking on the wallet icon. If your balance has still not been updated, try clicking the “Refresh Funds” icon after waiting a few minutes.
Step 5: Explore the OpenSea Marketplace
OpenSea is the most popular NFT marketplace to buy and sell NFTs on Ethereum, it’s home to thousands of NFT collections. Click on the “Explore” tab to have a look at all the collections or use to search bar to find a collection you wish to purchase from.
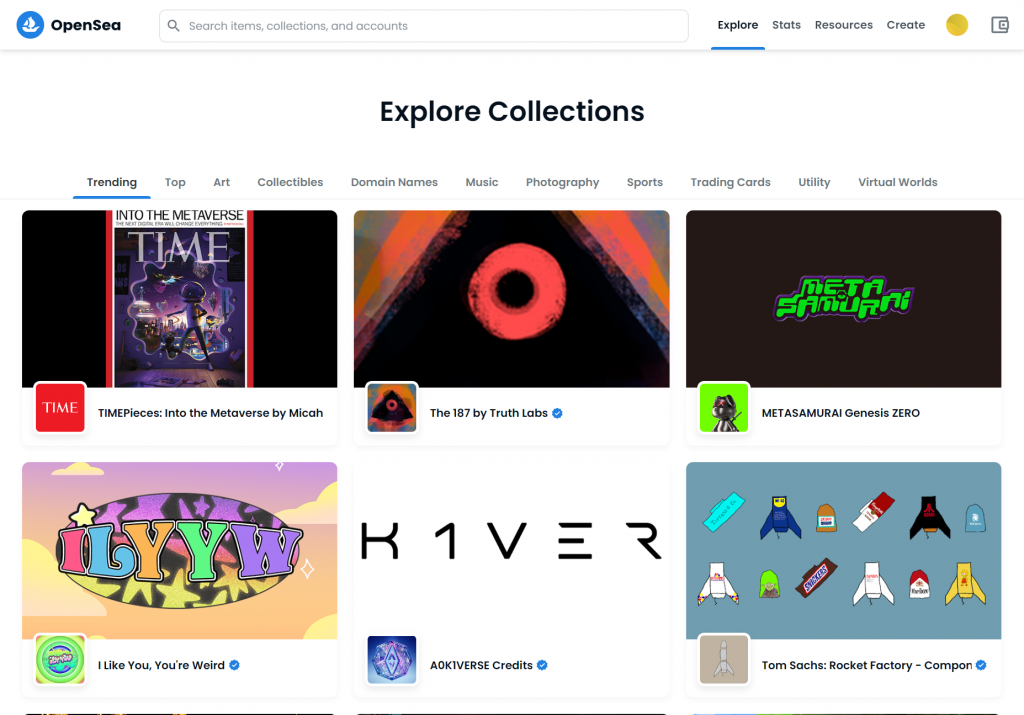
When buying NFTs, it’s important to DYOR (do your own research) to make sure you are not left with a worthless investment or scammed out of your money.
Once you have found the NFT you wish to purchase, and it’s within your budget, it’s time to buy!
Step 6: Buy an NFT on OpenSea
Now that you have found an NFT that you would like to purchase, let’s go through the different ways and what to look out for before rushing to buy.
Buy Now
If a seller has listed an NFT for sale on OpenSea it should have a “Buy now” price in Ethereum along with a buy now button for you to purchase.
This is a fixed price that the seller has agreed to sell for and the NFT can be bought immediately. You can see the USD equivalent end to the ETH amount.
Make sure you have enough to cover the gas fees for the transaction as well. This can typically range from $5-50USD depending on how many people are using the network.
If you are happy with paying that price you can click the “buy now” button on the NFT listing.
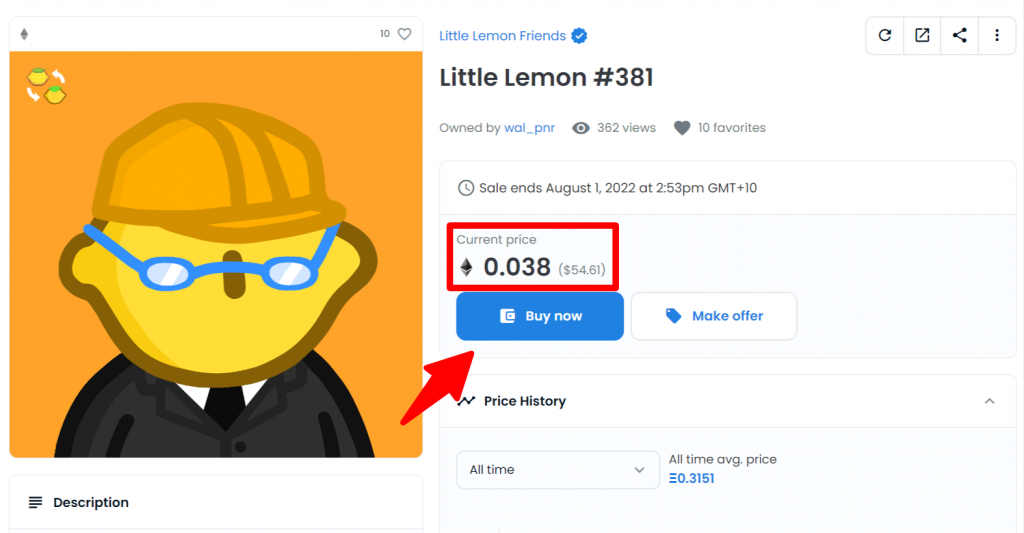
Then click the “Checkout” button.

Confirm the transaction on MetaMask and wait for OpenSea to approve.
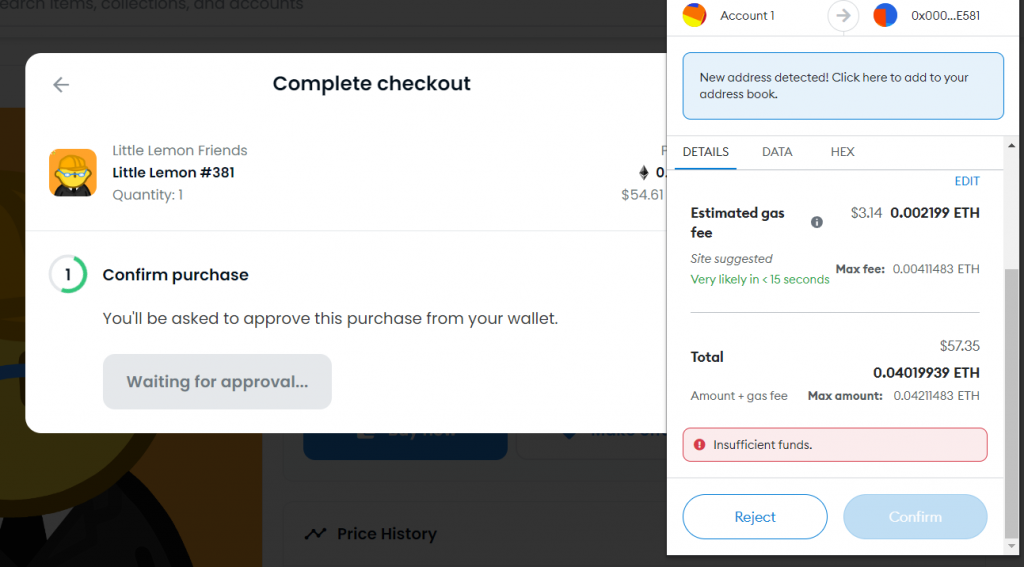
Congrats! You just purchased an NFT on OpenSea. Now head over to your profile and look at your collection to see the purchased NFT.
Make Offer
If you find an NFT you want but don’t want to pay the price, OpenSea gives you the option of making the seller an offer. To do this click the “make offer” button on the NFT listing.
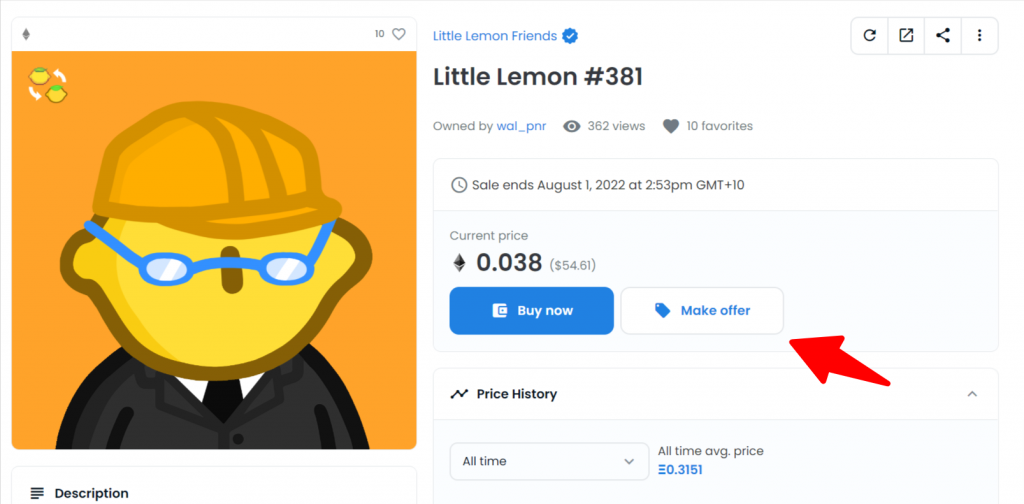
Choose the amount of WETH (Wrapped ETH) that you wish to offer for the NFT and click on “Add WETH”.

Deposit or “Wrap” your ETH by clicking “Wrap ETH” and confirm the transaction in MetaMask.

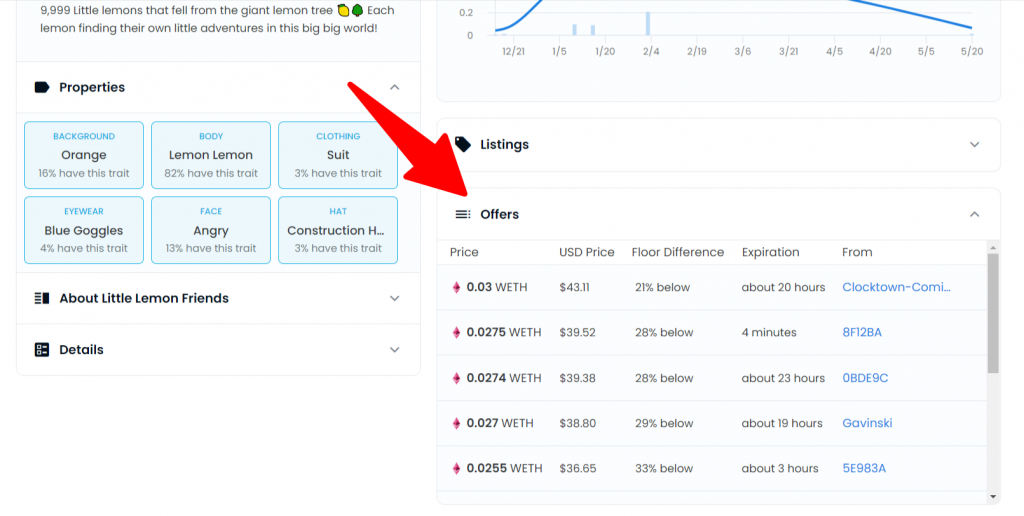
You will now be able to see your offer in the “Offers” tab of the NFT listing. If the seller decides to accept your offer then the transaction will automatically take place and the NFT will be sent to your wallet.
Your NFT Journey
Now that you have successfully purchased your first NFT on OpenSea it’s time to go out and explore all the different marketplaces and chains for NFTs. We recommend having a look into some Solana wallets and NFTs on MagicEden as there is a lot more to offer than just Ethereum NFTs.


