
What is MetaMask?
MetaMask is a free, self-custodial software crypto wallet designed for the EMV compatible blockchains. You can use it to interact with decentralized applications, which we also call “dApps,” and store erc 20 tokens like ETH, SHIB, and USDT. In March 2022, Metamask reported it reached over 30 million active users.
The MetaMask wallet was developed by ConsenSys Inc. in 2016, and in its first form, it was available as a browser extension. Anyone with a Chrome or Firefox browser could use it to access the Ethereum blockchain. It was later introduced for Brave and Edge browsers as well. In 2020, the company released the first mobile app version of MetaMask. From that point, it was available to Android and iOS users as well.
It’s good to know Ethereum is not the only blockchain supported by MetaMask. You can also use it to access other Layer2 chains such as the Binance Smart Chain (BSC), Polygon, Avalanche, Fantom, and Arbitrum.
Now that you know what MetaMask is, read on to learn its common use cases. Later in this article, we will also explore how to set it up and how it compares to other crypto wallets.
What is MetaMask Used For?
Wondering what you can use MetaMask for? Check out the complete list of its capabilities below.
- Sending and receiving cryptocurrencies (erc 20 tokens)
- Sending and receiving non-fungible tokens (NFTs)
- Gaining access to decentralized applications (dApps)
- Gaining access to decentralized exchanges (DEXs)
- Gaining access to decentralized finance (DeFi) platforms
- Accessing other EMV layer-1 and layer-2 blockchains
- Storing and managing private keys
Sending and Receiving Cryptocurrencies
Exchanging cryptocurrencies is the number one use case of any crypto wallet. You can use it to send or receive payments and swap different tokens for one another.
Sending and Receiving NFTs
Since NFTs took the world by storm in 2021, it’s no wonder this feature is in such high demand.
MetaMask is one of the best wallets that provide you with full NFT support. That means you can send, receive, and manage your NFT assets in one place.
Not all wallets come with full NFT support, however. That’s why in some cases, you have to rely on third-party apps to make them work with NFTs.
Check out our picks for the best NFT wallets for mobile.
Gaining Access to Dapps
You can also use MetaMask to connect to decentralized applications. To interact with these applications, you would use your browser just like with a regular website. The only requirement is that you first connect to them with a dApp-capable wallet such as MetaMask.
Note: Be careful when connecting to dapps and take good care when deciding which permissions you will give them. There’s a variety of dapp scams today that can empty your wallet as soon as you connect to them.
Gaining Access to DEXs
With MetaMask, you have access to a wide variety of different decentralized exchanges. Over one hundred, in fact. Some of these include 1inch, PancakeSwap, Uniswap, SushiSwap, etc.
Decentralized exchanges can differ significantly in their features and services. So this gives more power to the user, allowing you to decide which exchange you want to use for which purpose.
Storing and Managing Private Keys
Like all crypto wallets, MetaMask will allow you to store and manage your private keys. It’s important to keep these keys in a secure place ensuring not to lose them.
Now that we understand what we can use MetaMask for, let’s create a wallet and start using it.
How to Set Up a MetaMask Wallet
Ready to set up your first MetaMask wallet in the browser? That’s easy. Just follow these four simple steps we outlined below.
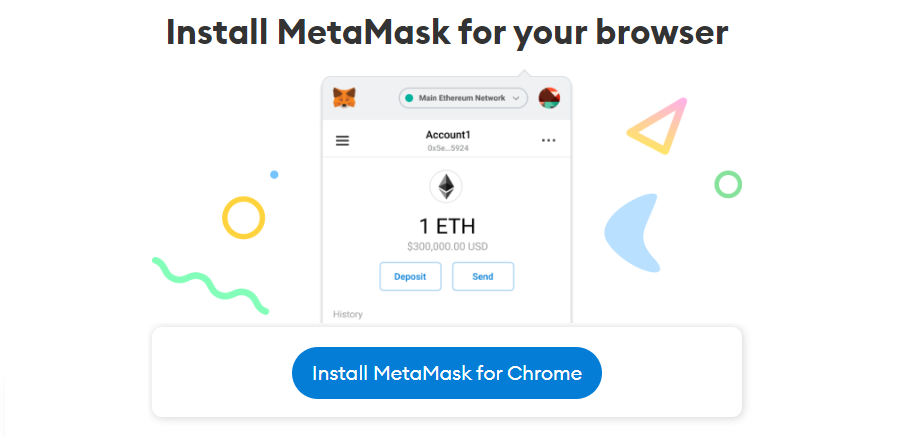
1. Download the MetaMask extension
Visit the download page on the official MetaMask website by clicking here. Then click on the “Install MetaMask for Chrome” button.
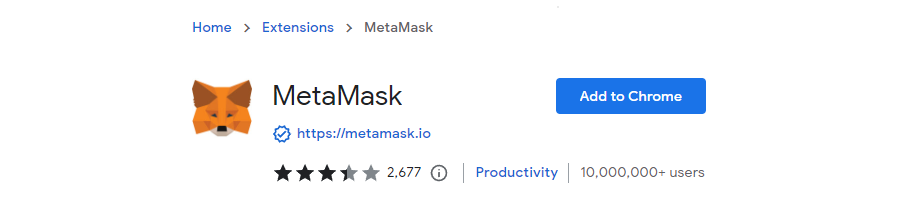
Once you’re in the Chrome web store, click the “Add to Chrome” button on the right.
Note: a browser notification will then pop up asking you to confirm. Click the “Add Extension” button.
Now that the extension is installed, it will automatically open in a new window. Click the “Get Started” button.

2. Create a wallet
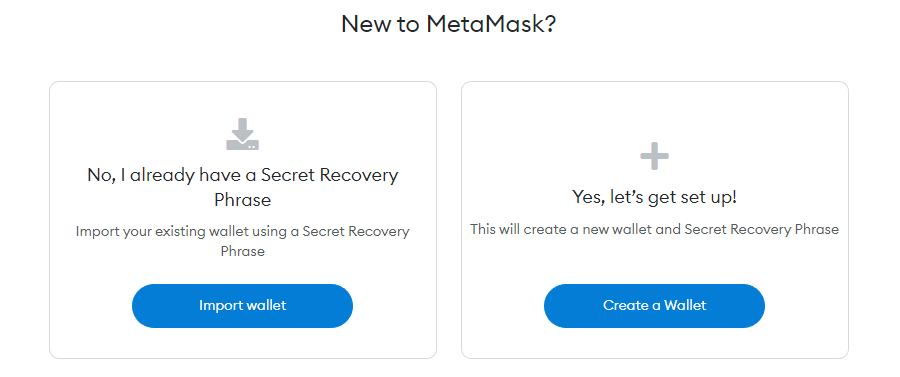
At this point, it will ask you if you have an existing wallet. Since we wrote this guide for new wallets, let’s go with the “Create a Wallet” button.
Note: MetaMask will now ask you to provide optional access to anonymized statistics. That is something you need to decide for yourself.
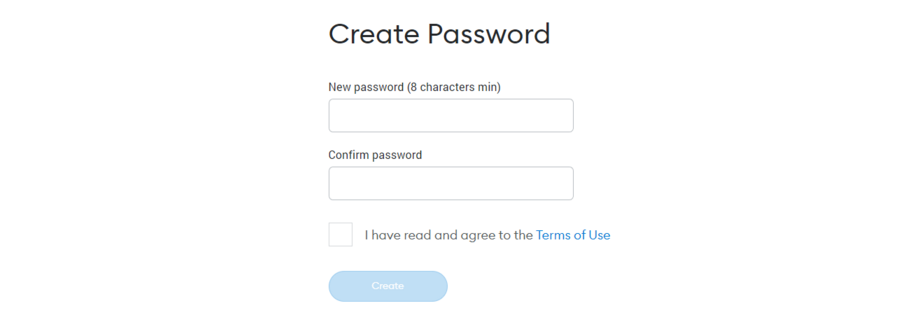
3. Set the password
Now, it’s time to create a password. Once you enter it twice, you will need to read and accept the terms of use. When you’re ready, click the “Create” button to finish.
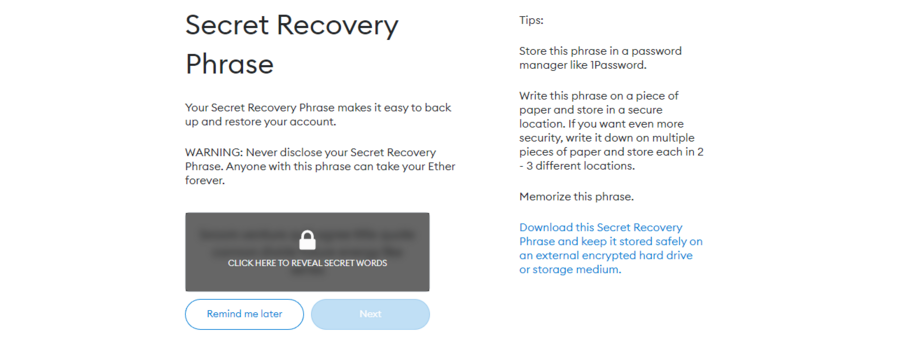
4. Confirm and back up the secret recovery phrase
MetaMask will now generate and provide a twelve-word passphrase for you. So click the lock with the blurred background to reveal it, and then store it somewhere secure. You will need it for the next step.
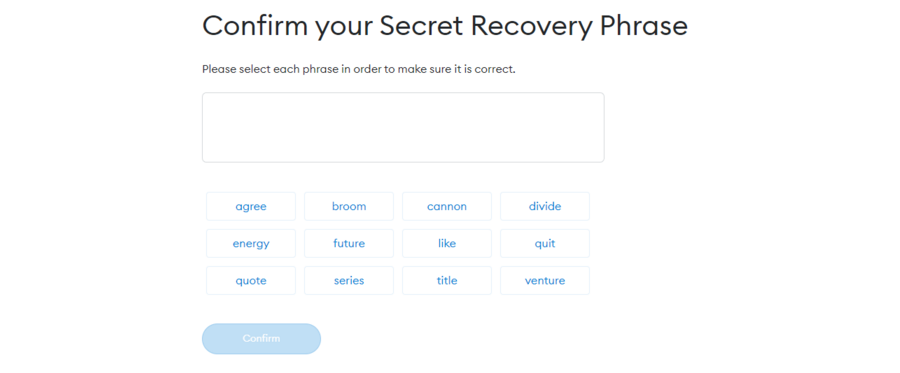
Congratulations, you’ve reached the last step! Enter your secret recovery phrase by clicking on the corresponding word blocks in proper order. Click the “Confirm” button.
Now here are some tips on how to best take care of your passphrase:
- Don’t share it with anyone
- Store it in several places in case you lose access to one of them
- If you need to create a new backup, just go to Settings > Security
- Avoid phishing scams (MetaMask won’t ask for your phrase via email or social media)
That’s it. You’ve just created your first MetaMask wallet.
But how do you actually use it? We will dig into this in the next segment.
How to Use MetaMask
Using MetaMask to Transfer Coins and Tokens
Want to send some Ethereum to another wallet? Let’s see how it’s done. Just follow the steps below.
- Make sure you’re currently in the proper account, the one you want to send from.
- Tap the “Send” button in the center
- Enter the public address of the recipient or pick one that you stored in the address book
- Enter the total amount you wish to send
- Tap “Next”
- The approximate gas fees will now show up. Adjust them as needed.
- Tap “Confirm” to execute the transaction
- You will now land on the homepage, and you can see check the transaction in the Activity tab
Using MetaMask to Connect to Dapps
In most cases, the dapp’s website will show a button like “Connect wallet.” By clicking the button, you will connect your wallet to the dapp.
But sometimes a dapp won’t offer this feature automatically. So what should we do then?
There’s a way to manually connect your wallet to the dapp. Just follow our guide.
- Keep the dapp’s website open
- Open the MetaMask extension
- Go to the three-dot menu and click on “Connected sites”
- Click on “Manually connect to current site”
- Select your wallet and click on “Next”
- Review the displayed information and click “Confirm”
Using MetaMask to Add NFTs
If you’d like to add an NFT to Metamask, just follow the steps below.
- First, go to the “Assets” tab and click the “Import tokens” button
- Now go to the “Custom token” tab to provide the contract address for your NFT.
- The Symbol field will likely populate automatically. If it doesn’t, you can type in anything.
- Set the decimal to 0.
- Finally, click the “Add Custom Token” button.
Using MetaMask to View NFTs
To view your NFT collection with MetaMask, you will need to use the mobile app. The function wasn’t yet added to the browser extensions, unfortunately.
In the mobile app, there’s a special NFT tab for this purpose. But you might need to enable it if it’s not showing up. You can find the option in Hamburger icon > Settings > Security & Privacy > Advanced.
If MetaMask’s autodetect option doesn’t show your NFT, you can add it manually. We will list the steps below.
- Retrieve and copy the NFT address from your marketplace
- Open the NFT tab on your MetaMask phone app
- Tap on “Import NFTs”
- Paste the NFT address
- Retrieve and copy the NFT ID
- Paste the NFT ID
- Tap the “Add” button
And voila, you’ve added your NFT manually. You can now view it alongside the others in the NFT tab.
Using MetaMask to Swap Tokens
If you’d like to learn how to swap tokens, just follow our guide below.
- Select the token you have using the top drop-down menu
- Select the token you wish to acquire using the next drop-down menu
- Set the number of tokens you want to spend to acquire the desired token
- Click the “Get quotes” button at the bottom of the screen
- Finally, click the “Swap” button to execute the transaction
That’s it. The swap is now complete.
Blockchains That MetaMask Supports
Alongside Ethereum, MetaMask also supports other EMV compatible layer-1s and layer-2s. Some of which include:
- Binance Smart Chain (BSC)
- Arbitrum
- Polygon
- Avalanche
- Optimism
- Fantom
- Cronos
- Klaytn
You can read the full list of compatible chains here.
Comparing MetaMask with Other Wallets
Want to know how MetaMask compares to popular alternatives? We made the table below so you can easily view their features side-by-side.
| Wallet | MetaMask | Trezor Model One | Exodus | MyEther Wallet | Ledger Nano S | Jaxx | Atomic Wallet | Coinbase Wallet | Guarda | Argent |
| Type | Web, mobile | Hardware | Web, mobile, desktop | Web, mobile, desktop | Hardware | Web, mobile, desktop | Mobile, desktop | Web, mobile | Web, mobile, desktop | Web, mobile |
| Self Custody | Yes | Yes | Yes | Yes | Yes | Yes | Yes | Yes | Yes | Yes |
| Price | Free | $72 | Free | Free | $79 | Free | Free | Free | Free | Free |
Read our MetaMask vs. Trust Wallet comparison here.
Final Words
Alright, time to wrap this up. So far, we’ve covered what MetaMask is, how it works, and compared it with other popular wallet solutions.
Now that you know what it’s all about and how to set it up, it’s time to test it out yourself!